Android Custom View 102 (Part 7)
Tips and tricks of drawsing text
Drawing text can be tricky at times, let’s look at some examples.
First, let’s look at some terminologies used here.
Some most important keywords are:
- baseline: the line where the text “sits on”
- ascent: The recommended distance above the baseline for singled spaced text
- descent: The recommended distance below the baseline for singled spaced text
- top: The maximum distance above the baseline for the tallest glyph in the font at a given text size
- bottom: The maximum distance below the baseline for the lowest glyph in the font at a given text size
A picture is worth 1000 words:
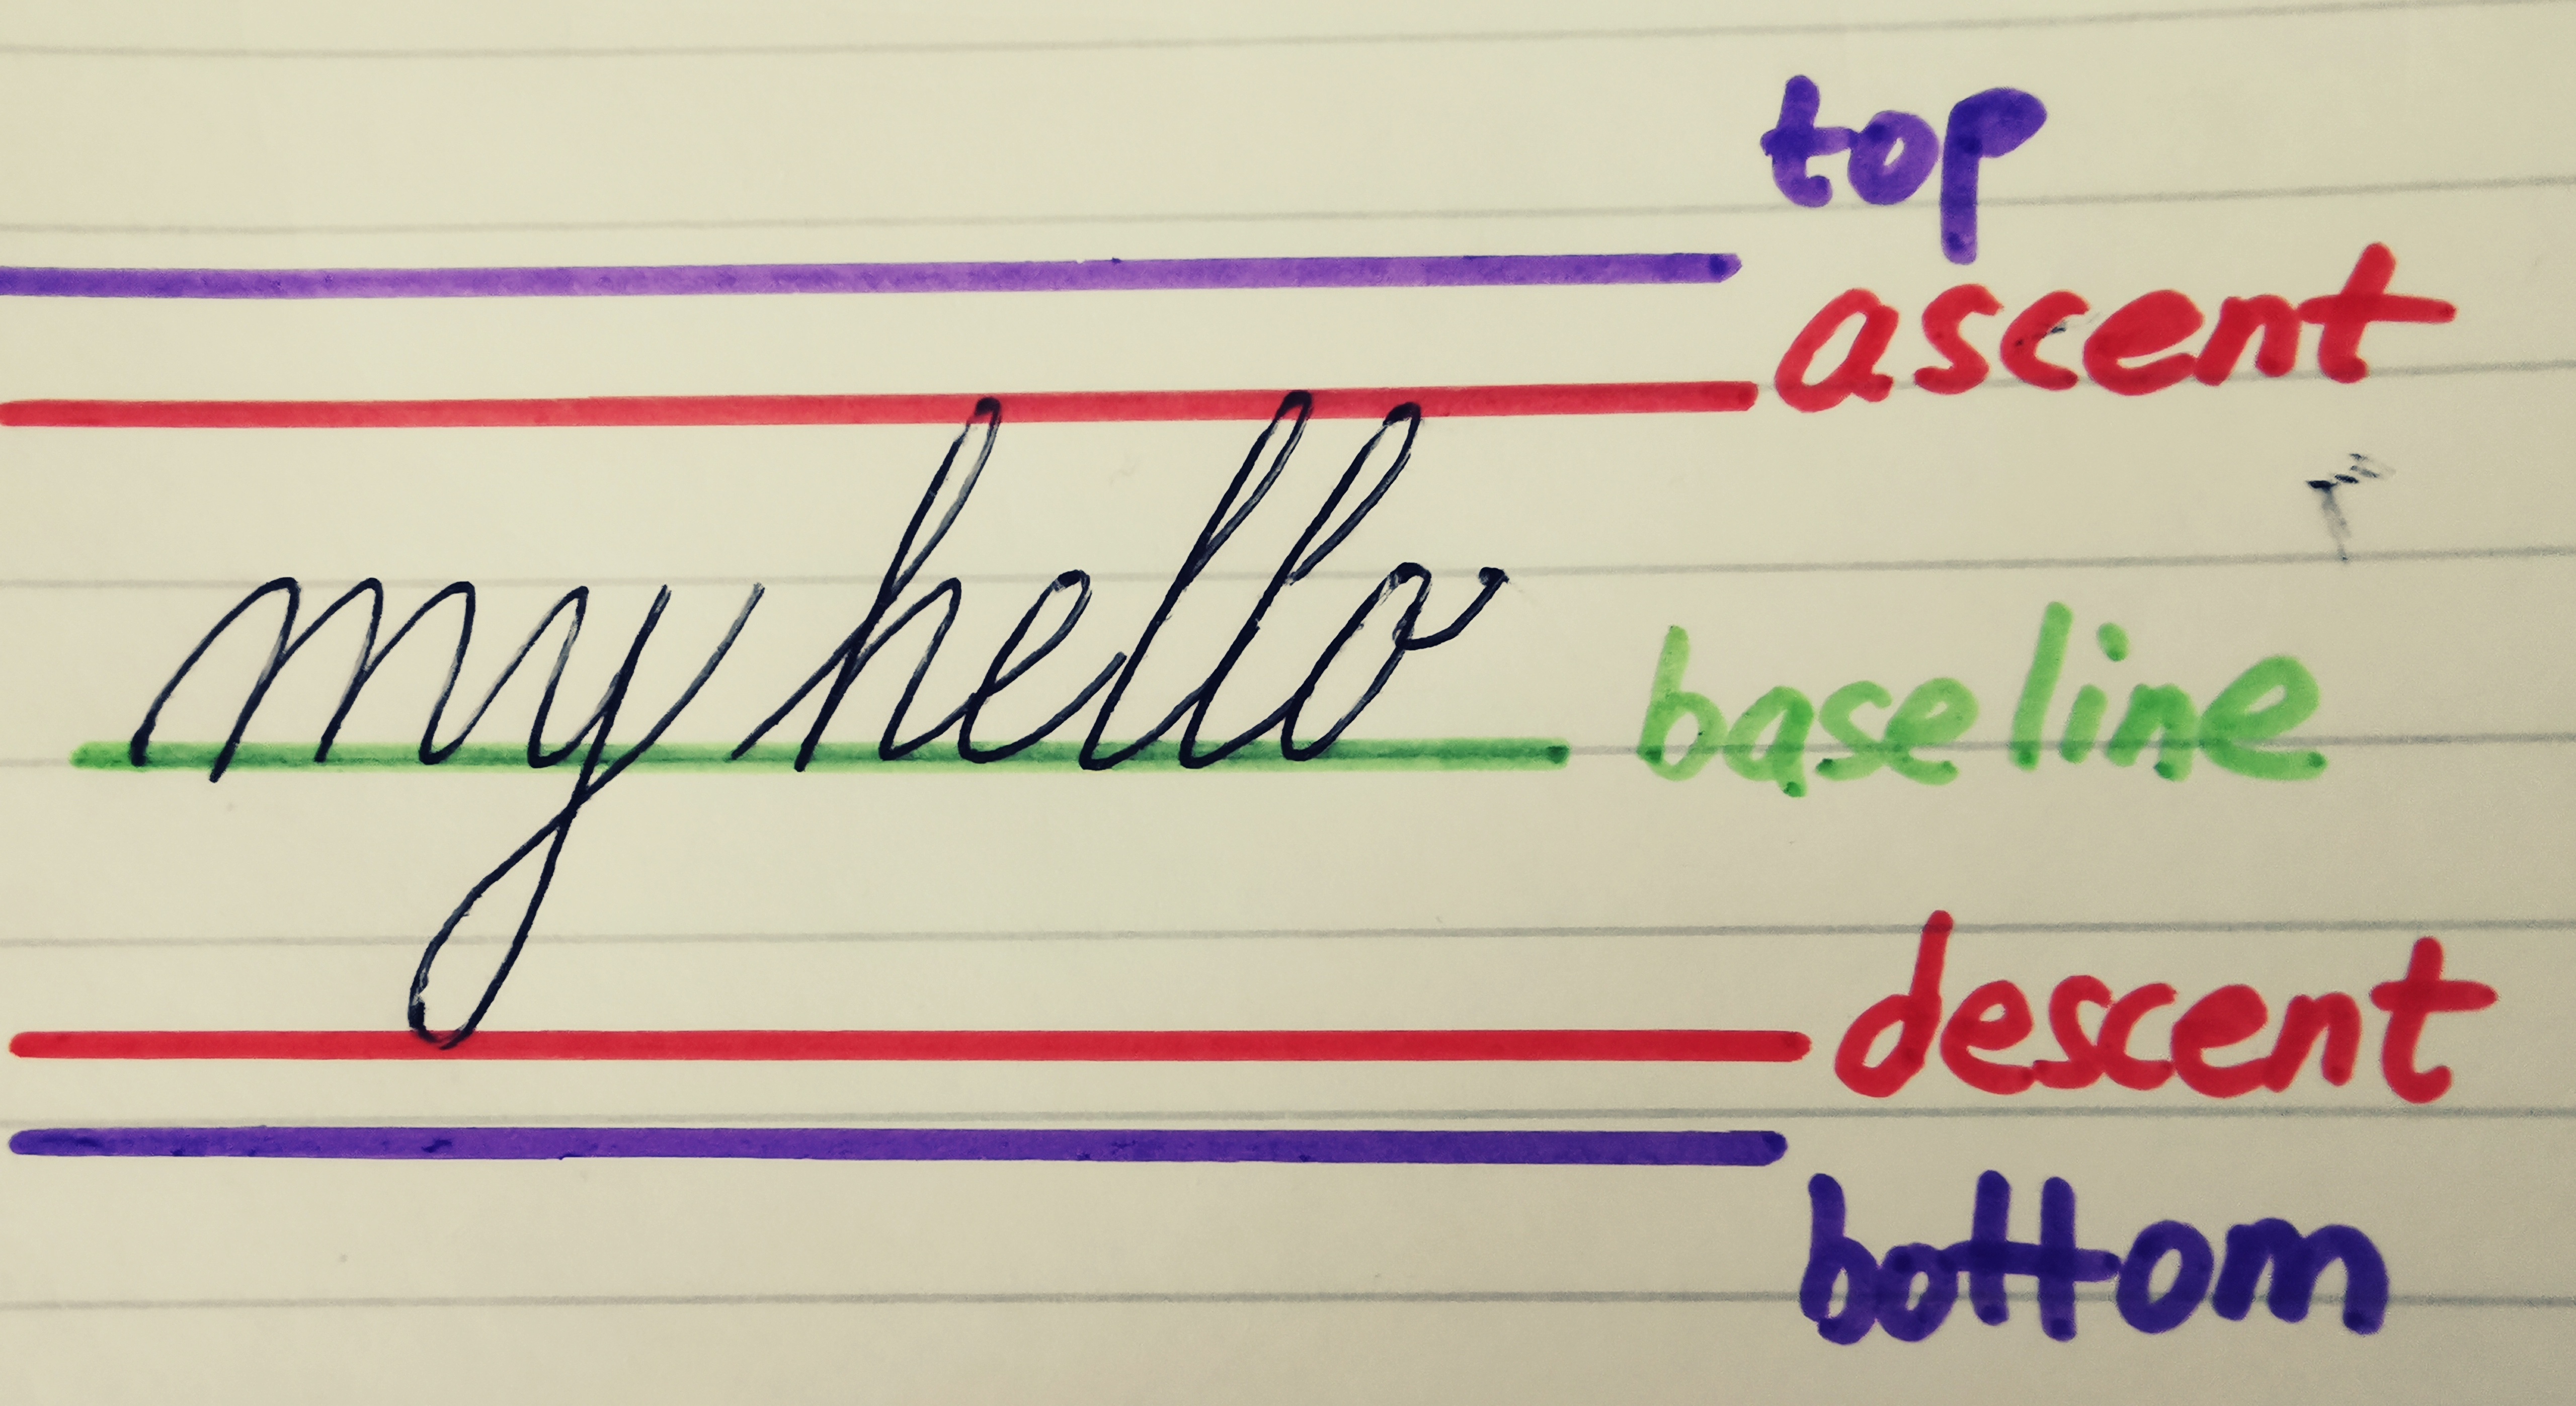
Note that these lines are fixed, they are not dependent on the actually content of the text. For example, if the text is “aaa”, then it would look like:
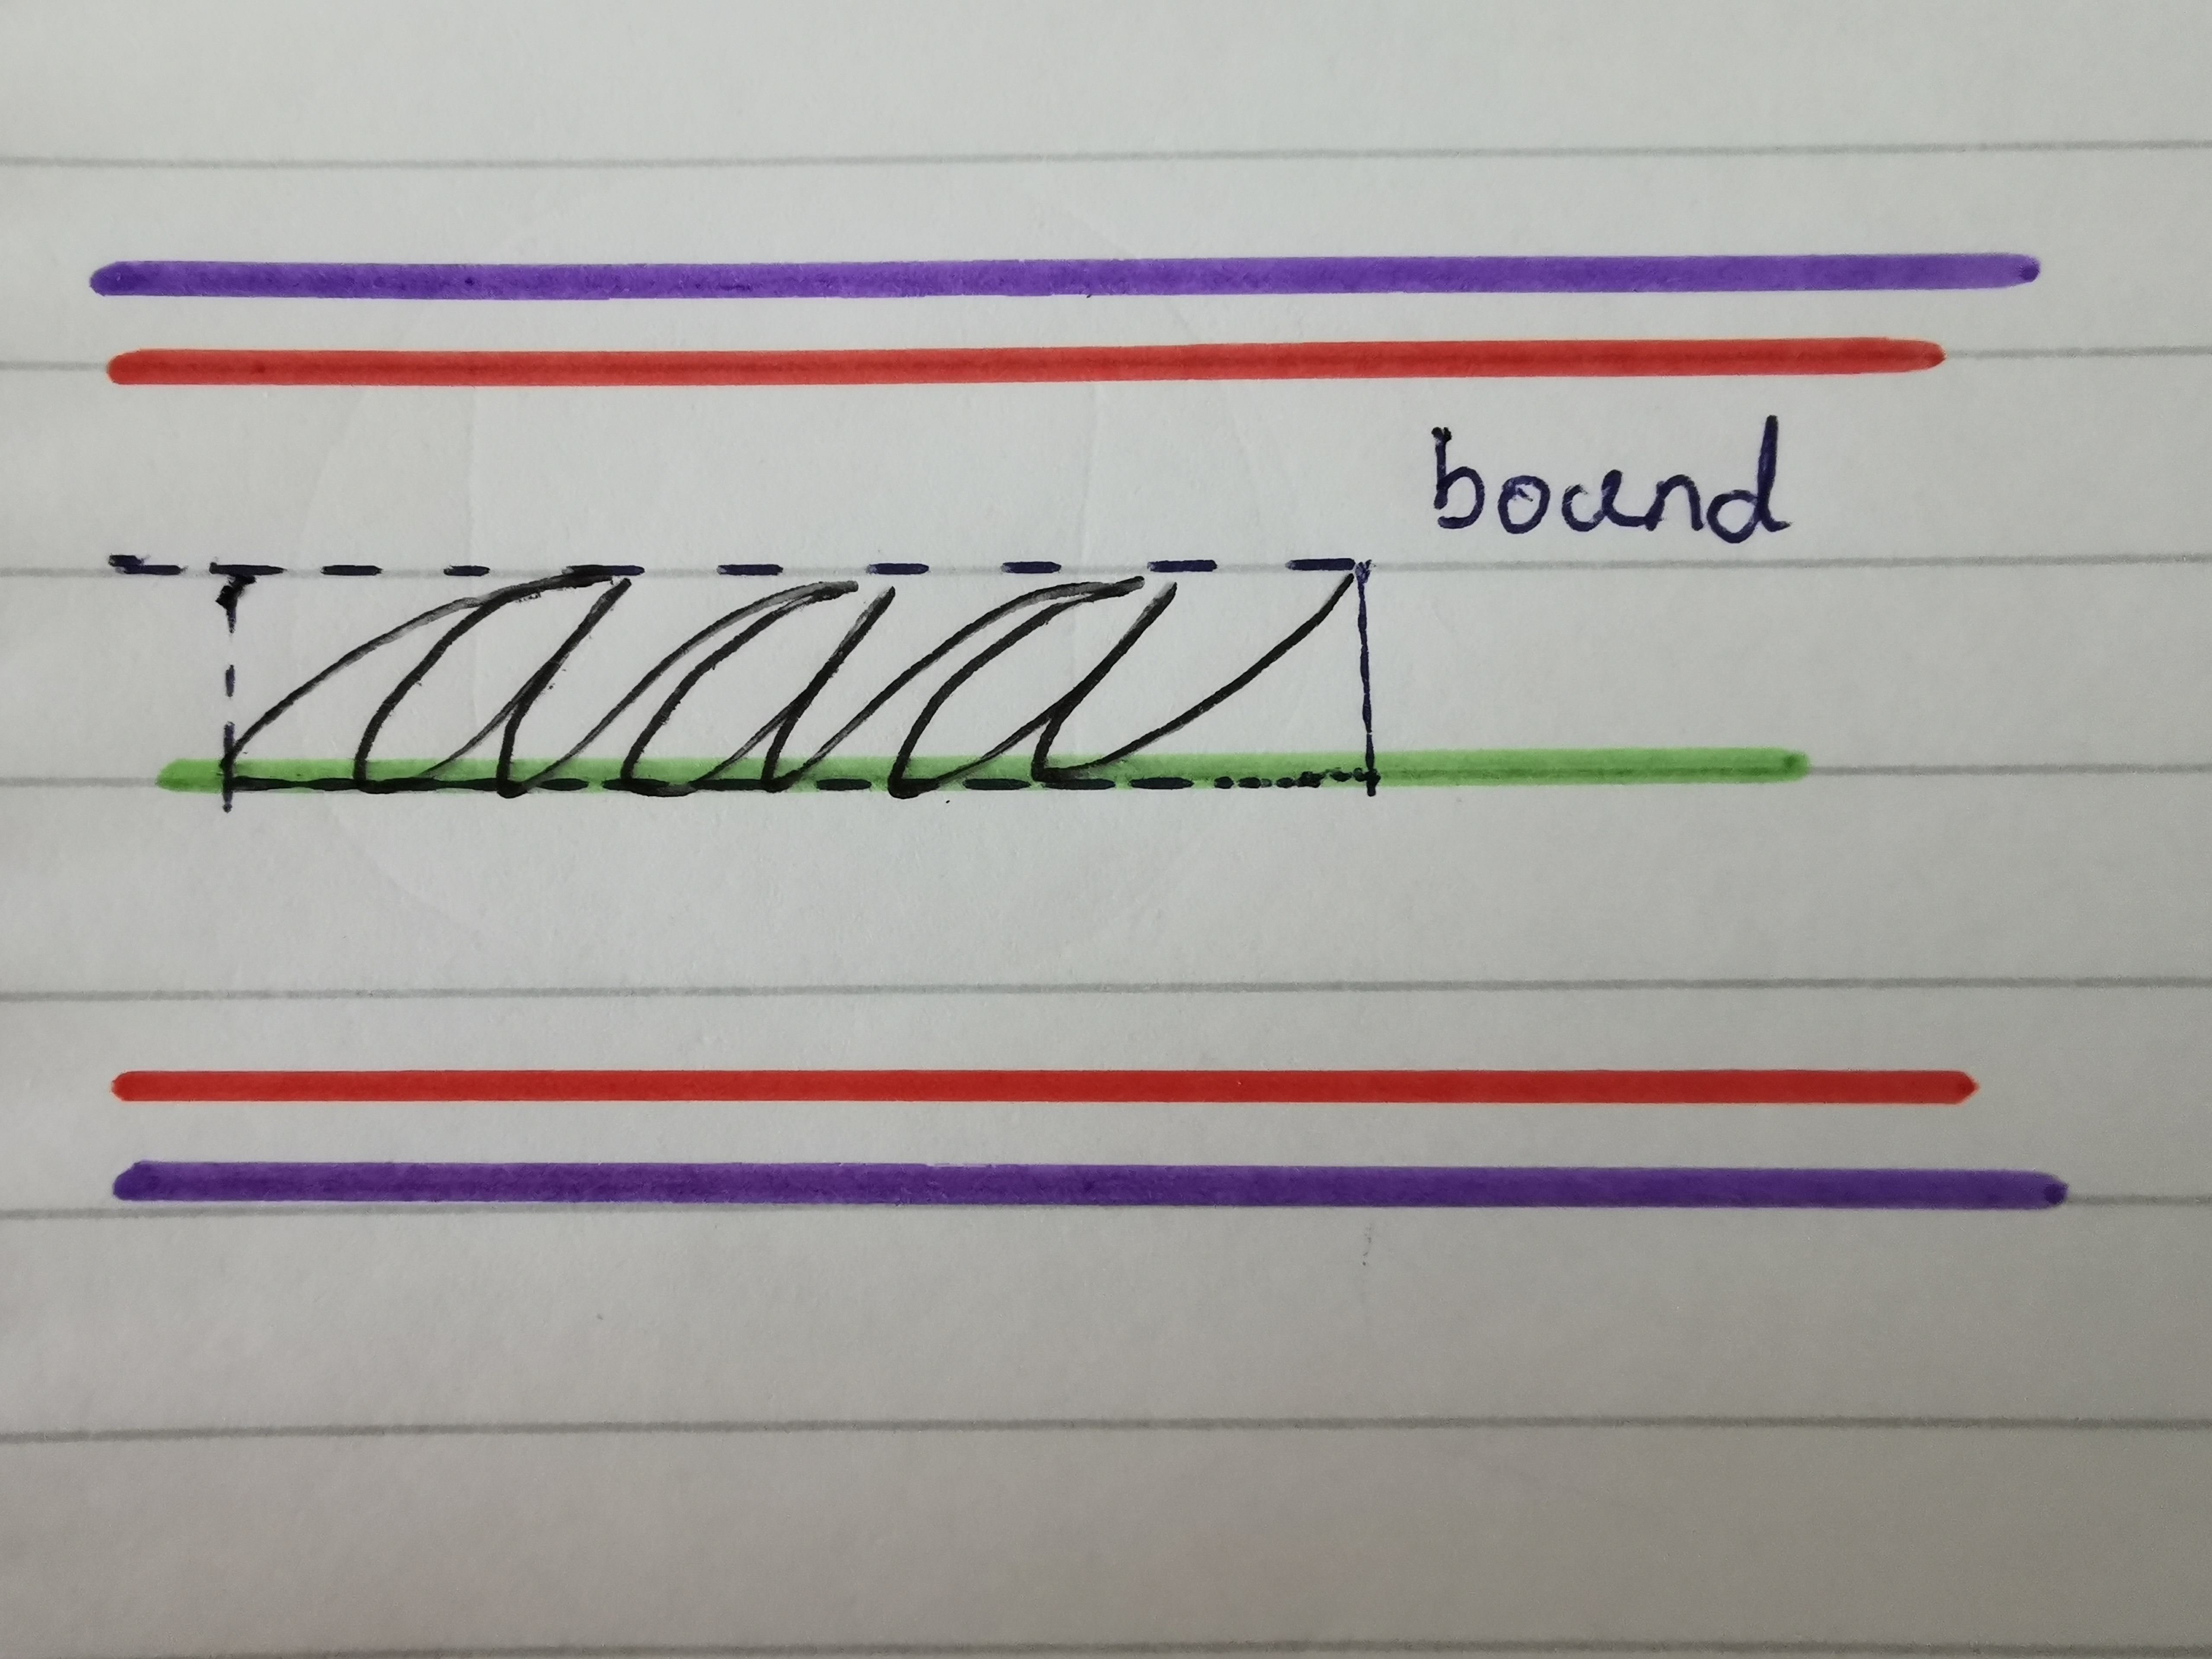
As you can see from the second picture, we can also get the bound of the text, which is exactly as big as the actually text. This can be useful in some cases, we will discuss it later.
Now let’s see how to apply this knowledge.
Position the text in the center of the view
To put the text horizontally in the center is easy, simply do:
paint.textAlign = Paint.Align.CENTERThe doc is very clear about this:
/**
 * Align specifies how drawText aligns its text relative to the
 * [x,y] coordinates. The default is LEFT.
 */
public enum Align {
    /**
     * The text is drawn to the right of the x,y origin
     */
    LEFT    (0),
    /**
     * The text is drawn centered horizontally on the x,y origin
     */
    CENTER  (1),
    /**
     * The text is drawn to the left of the x,y origin
     */
    RIGHT   (2);
}
The difficult part is how to put the text vertically in the center. This is a problem because text is drawn from the baseline. So if we simply draw the text at the center of the view, we will get:
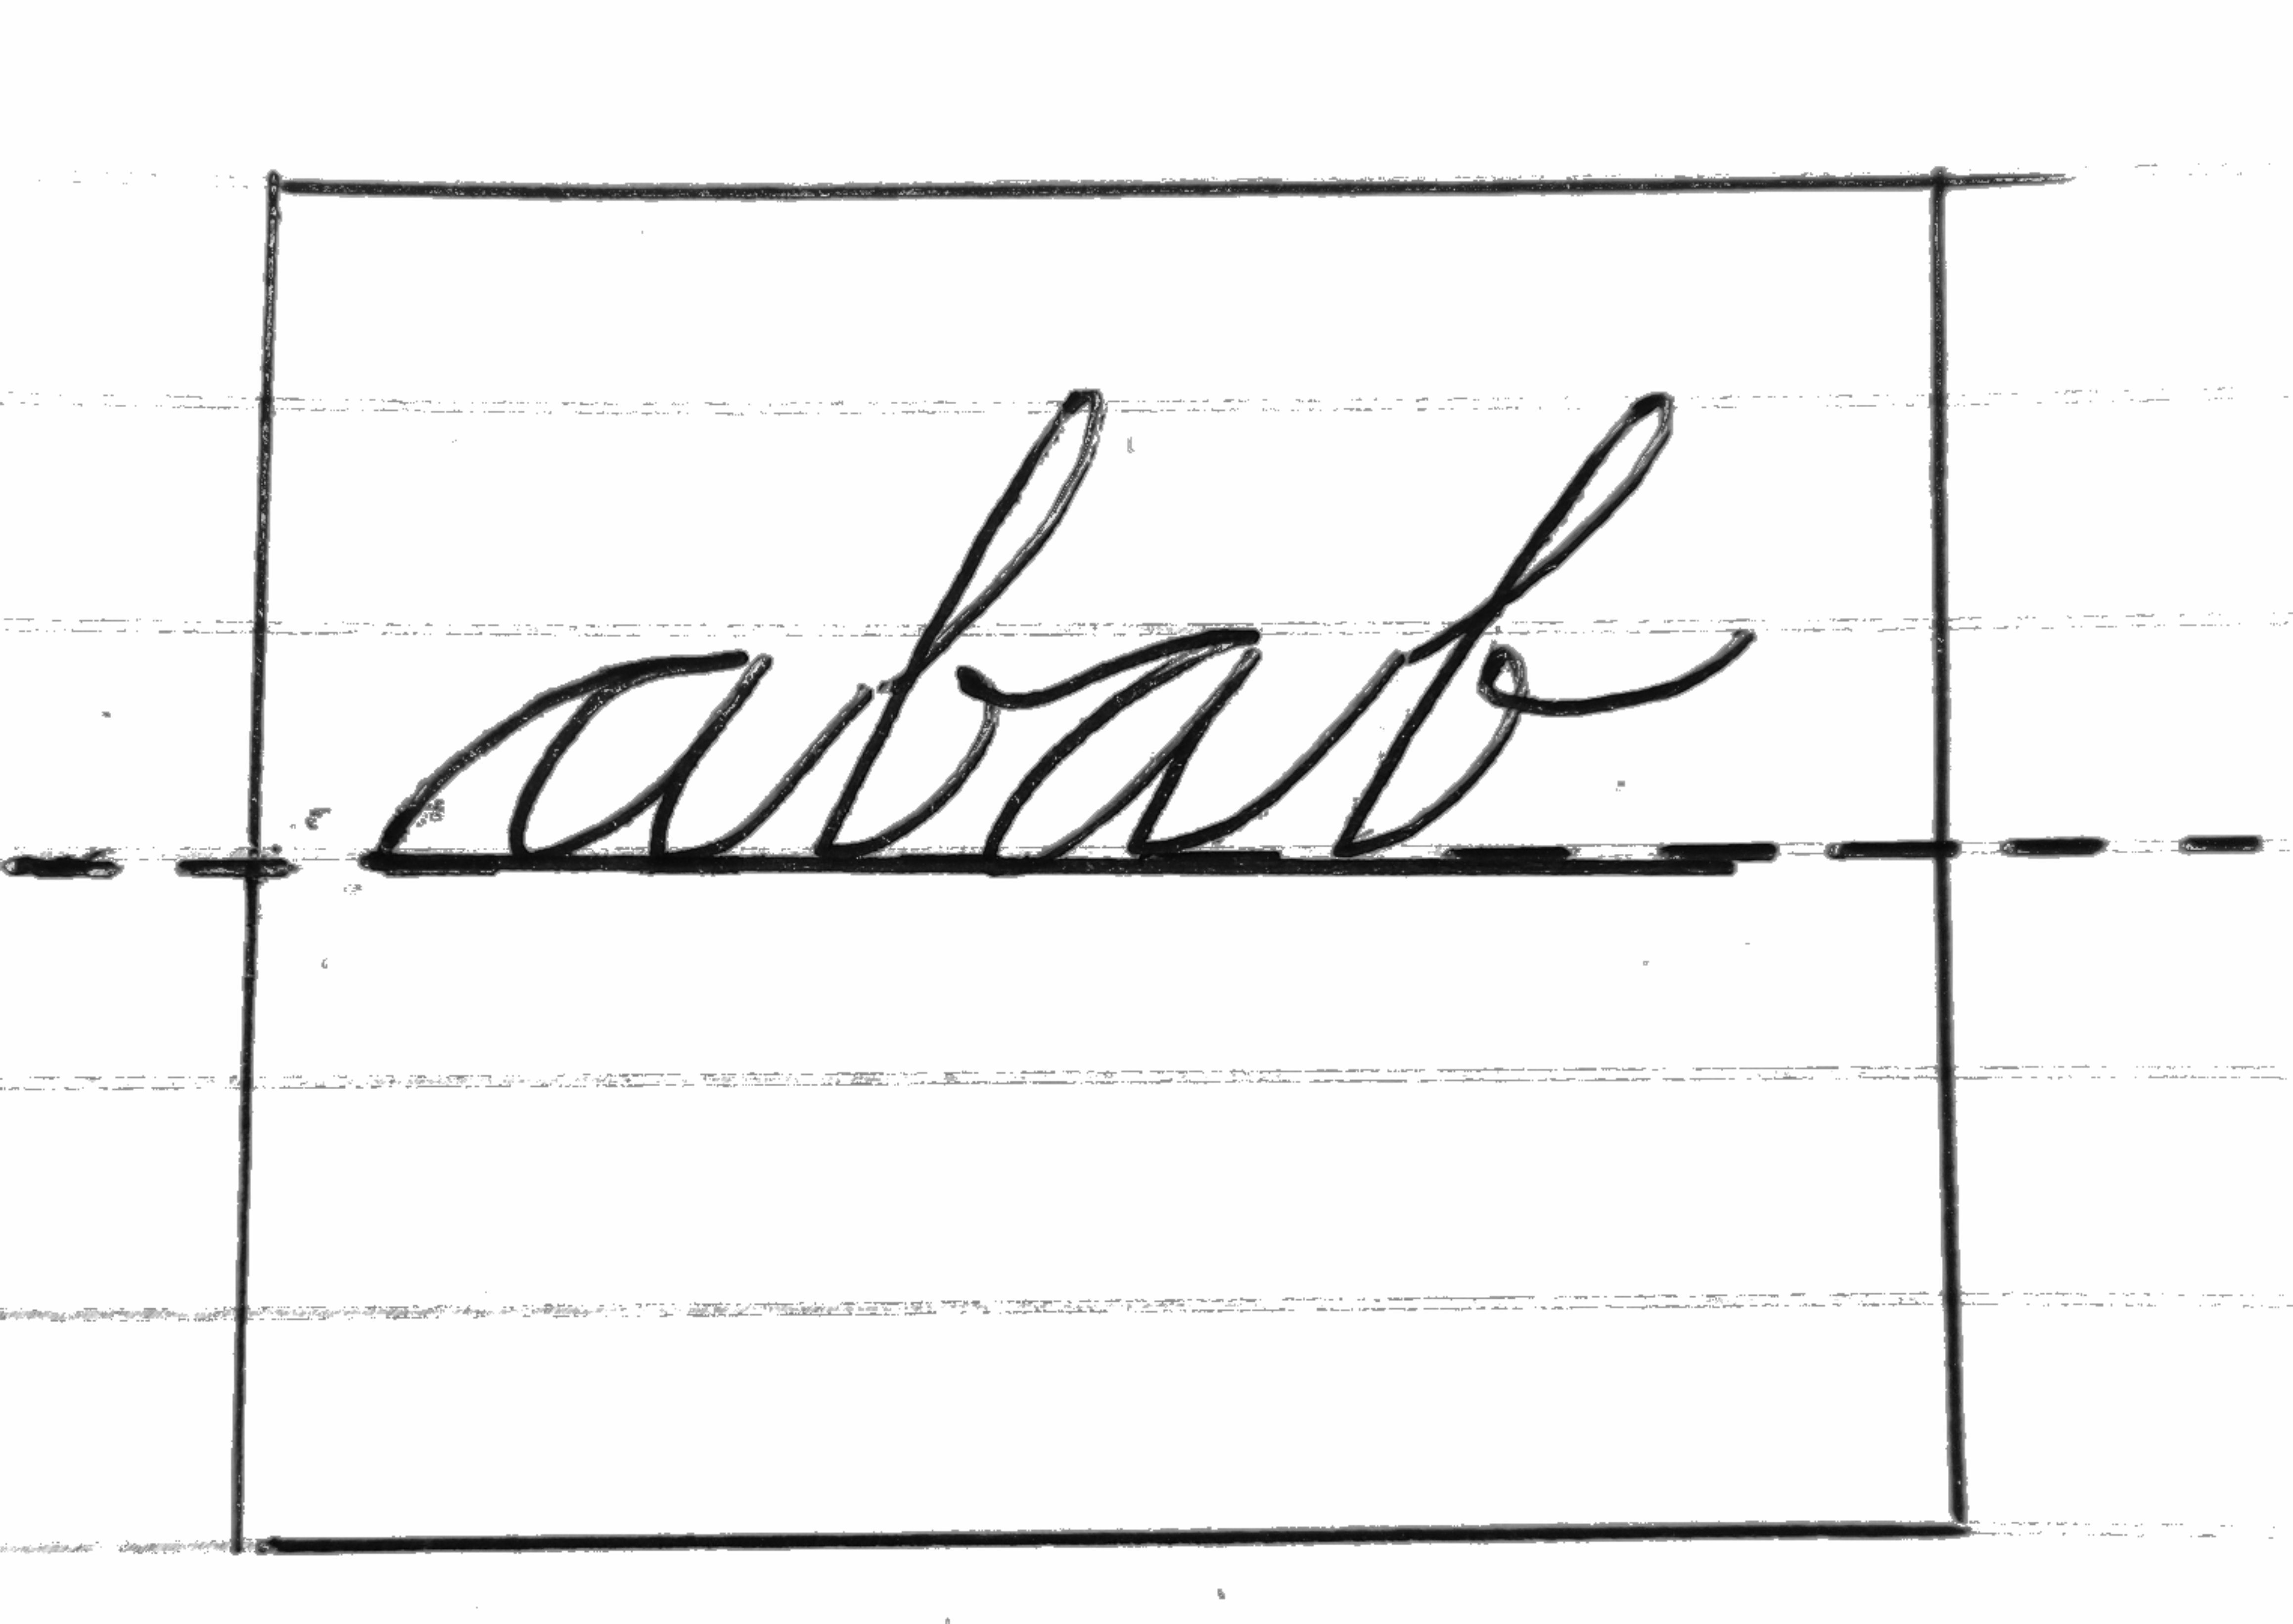
As you can see, the text is too high, we need to bring it down a bit. But how much?
There are 2 ways: one is to use the text bounds, one is to use the ascent and descent (or top and bottom).
The ways to calculate are the same, find some offset and shift down that offset when drawing:
val offset = (fontMetrics.ascent + fontMetrics.descent) / 2
canvas.drawText(text, width / 2.0f, height / 2.0f - offset, paint)
val offset = (textBounds.top + textBounds.bottom) / 2
canvas.drawText(text, width / 2.0f, height / 2.0f - offset, paint)Can you already see the difference of these two approaches? and when to use which?
Hint: the bounds change based on the actual text, but the ascent and descent don’t.
OK, reveal the anwser here. If you want the text to be always 100% dead center, then use the bounds. But there is one downside with this approach, if your
text change, then the position will also change, so the text will be jumpy at runtime. To avoid this, you can use ascent and descent, even though it may not
always be 100% dead center.
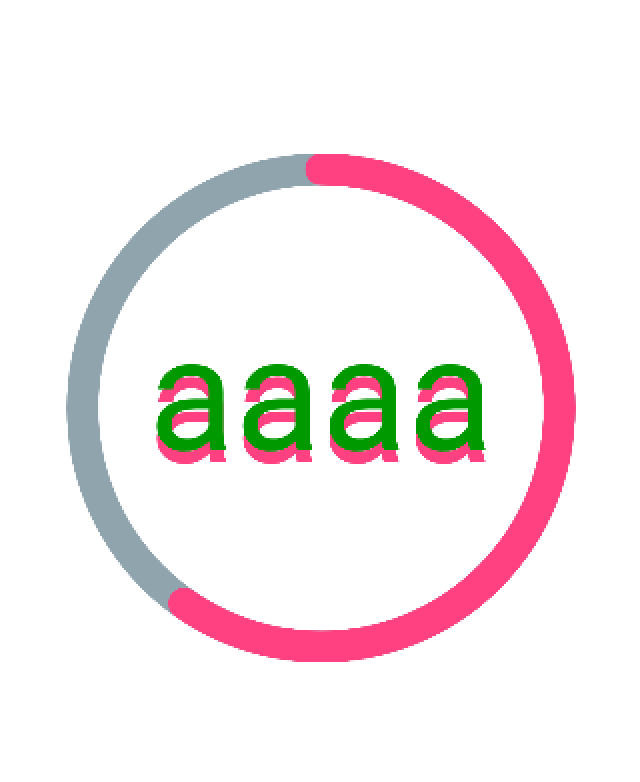
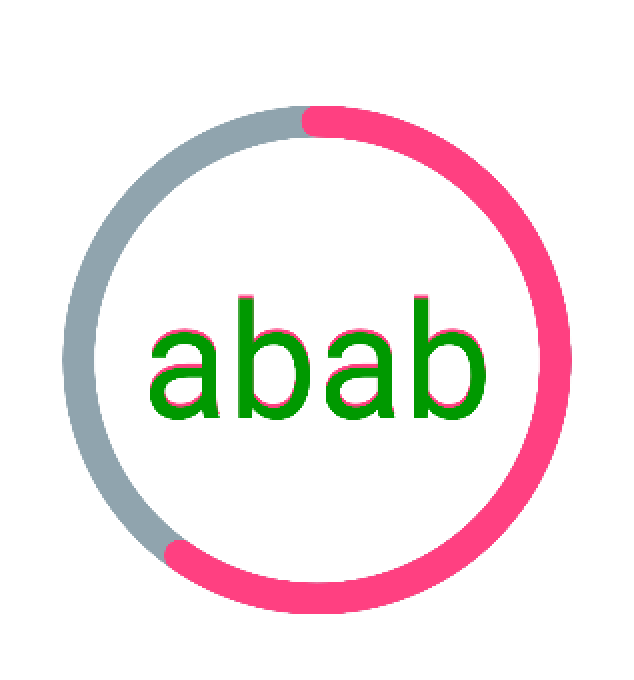
Let’s see the difference. The pink text is using the ascent/descent and the green text is using bounds.
Align texts of different sizes
If we simply draw text from the same x (e.g. 0.0), it will look like this:
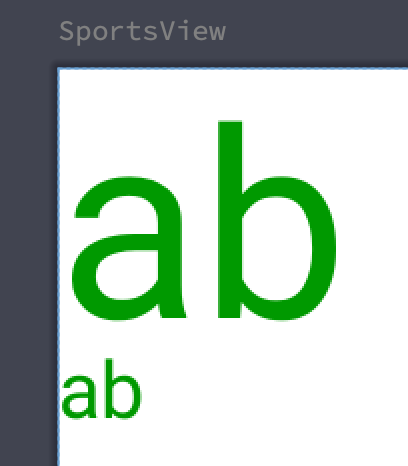
First, there is a gap from the left side of the screen, second the gaps of these two texts are different! This looks rather ugly, how do we fix it? Well, we can simply remove the gap. The gap is actually the bounds.left.
paint.getTextBounds(
    text, 0, text.length, textBounds
)
canvas.drawText(text, -textBounds.left.toFloat(), 250.0f, paint)
paint.textSize = dp2px(30)
paint.getTextBounds(
    text, 0, text.length, textBounds
)
canvas.drawText(text, -textBounds.left.toFloat(), 350.0f, paint)
Now this looks much better:

The code so far:
class SportsView @JvmOverloads constructor(
    context: Context, attrs: AttributeSet? = null, defStyleAttr: Int = 0
) : View(context, attrs, defStyleAttr) {

    private val RING_WIDTH = dp2px(20)
    private val RADIUS = dp2px(150)
    private val CIRCLE_COLOR = Color.parseColor("#90a4ae")
    private val HIGHLIGHT_COLOR = Color.parseColor("#ff4081")

    private val textBounds = Rect()

    private var text = "abab"

    private val paint = Paint(Paint.ANTI_ALIAS_FLAG)

    private val fontMetrics: Paint.FontMetrics

    init {
        paint.textAlign = Paint.Align.CENTER

        fontMetrics = paint.fontMetrics
    }

    override fun onDraw(canvas: Canvas) {
        super.onDraw(canvas)
        paint.textSize = dp2px(100)
        paint.style = Paint.Style.STROKE
        paint.color = CIRCLE_COLOR
        paint.strokeWidth = RING_WIDTH

        // draw grey circle
        canvas.drawCircle(width / 2.0f, height / 2.0f, RADIUS, paint)


        // draw progress arc
        paint.color = HIGHLIGHT_COLOR
        paint.strokeCap = Paint.Cap.ROUND
        canvas.drawArc(
            width / 2 - RADIUS,
            height / 2 - RADIUS,
            width / 2 + RADIUS,
            height / 2 + RADIUS,
            -90.0f,
            215.0f,
            false,
            paint
        )

        // draw text
        paint.style = Paint.Style.FILL
        paint.getTextBounds(
            text, 0, text.length, textBounds
        )
        val offsetStatic = (fontMetrics.ascent + fontMetrics.descent) / 2
        canvas.drawText(text, width / 2.0f, height / 2.0f - offsetStatic, paint)

        val offsetDynamic = (textBounds.top + textBounds.bottom) / 2
        paint.color = Color.parseColor("#009900")
        canvas.drawText(text, width / 2.0f, height / 2.0f - offsetDynamic, paint)

        // demo text align left
        paint.textAlign = Paint.Align.LEFT
        paint.getTextBounds(
            text, 0, text.length, textBounds
        )
        canvas.drawText(text, -textBounds.left.toFloat(), 250.0f, paint)
        paint.textSize = dp2px(30)
        paint.getTextBounds(
            text, 0, text.length, textBounds
        )
        canvas.drawText(text, -textBounds.left.toFloat(), 350.0f, paint)
    }
}
Draw text together with image
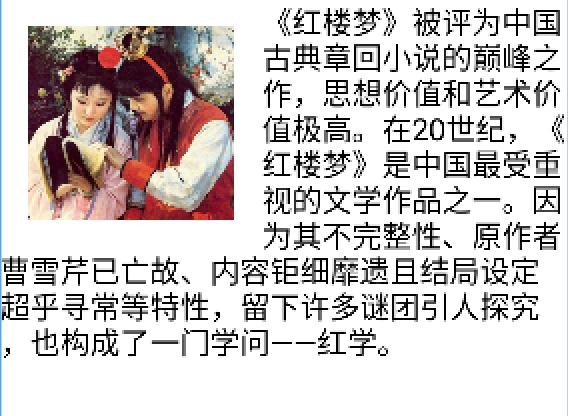
Sometimes you want to combine text and image, and draw text around the image for example.
There is this cool method breakText() that can help.
Let’s take an example:
Here is the code:
class ImageTextView @JvmOverloads constructor(
    context: Context, attrs: AttributeSet? = null, defStyleAttr: Int = 0
) : View(context, attrs, defStyleAttr) {

    private var paint = Paint(Paint.ANTI_ALIAS_FLAG)
    private var textPaint = TextPaint()
    private var text =
        "《红楼梦》被评为中国古典章回小说的巅峰之作,思想价值和艺术价值极高。在20世纪,《红楼梦》是中国最受重视的文学作品之一。因为其不完整性、原作者曹雪芹已亡故、内容钜细靡遗且结局设定超乎寻常等特性,留下许多谜团引人探究,也构成了一门学问——红学。"
    private var image: Bitmap
    private var metrics = Paint.FontMetrics()
    private var measuredWidth = FloatArray(1)

    override fun onDraw(canvas: Canvas) {
        super.onDraw(canvas)

        canvas.drawBitmap(image, IMAGE_PADDING, IMAGE_PADDING, paint)
        val length = text.length
        var yOffset = paint.fontSpacing
        var usableWidth: Int
        var start = 0
        var count: Int

        while (start < length) {
            val textTop = yOffset + metrics.ascent
            val textBottom = yOffset + metrics.descent
            usableWidth = if (interfereWithImage(textTop, textBottom)) {
                (width - IMAGE_WIDTH - 2 * IMAGE_PADDING).toInt()
            } else {
                width
            }
            val x = if (interfereWithImage(textTop, textBottom)) {
                image.width + IMAGE_PADDING * 2
            } else {
                0.0f
            }

            count = paint.breakText(text, start, length, true, usableWidth.toFloat(), measuredWidth)
            canvas.drawText(text, start, start + count, x, yOffset, paint)
            start += count
            yOffset += paint.fontSpacing
        }
    }

    private fun interfereWithImage(textTop: Float, textBottom: Float) =
        textTop > IMAGE_PADDING && textTop < IMAGE_PADDING + IMAGE_WIDTH ||
                textBottom > IMAGE_PADDING && textBottom < IMAGE_PADDING + IMAGE_WIDTH


    companion object {
        private val IMAGE_WIDTH = dp2px(150)
        private val IMAGE_PADDING = dp2px(20)
    }

    init {
        textPaint.textSize = dp2px(15)
        paint.textSize = dp2px(22)
        paint.getFontMetrics(metrics)
        image = getImage(IMAGE_WIDTH.toInt())
    }

    private fun getImage(width: Int): Bitmap {
        val options: BitmapFactory.Options = BitmapFactory.Options()
        options.inJustDecodeBounds = true
        BitmapFactory.decodeResource(resources, R.drawable.hongloumeng, options)
        options.inJustDecodeBounds = false
        options.inDensity = options.outWidth
        options.inTargetDensity = width
        return BitmapFactory.decodeResource(resources, R.drawable.hongloumeng, options)
    }
}
Twitter
Google+
Facebook
Reddit
LinkedIn
StumbleUpon
Email