Android Custom Views 101 (Part II)
Learn about Androd Custom View and ViewGroup

In Part I, we talked about how to create a simple custom view. But we don’t really implement the onMeasure(). In this post, we will analyze what problems we will have if we omit the onMeasure().
You can think of how the measurements are made as a conversation between the child and parent views.
The child tells its parent how it wants to be laid out by using LayoutParams. This can either be set in xml file or programatically. Like:
android:layout_width="match_parent"
android:layout_height="wrap_content"
android:layout_marginTop="80dp"
The parent communicates the size constraints of the child through MeasureSpec. MeasureSpec is a integer value made up of a mode and a size. The modes can be:
- EXACTLY X -» Size is exactly X
- AT_MOST X -» Any size up to X
- UNSPECIFIED -» No constraints
The communication happens as following steps:
- Child specifies
LayoutParamsin Java or XML. - Parent calculates width/height
MeasureSpecsand passes tochild.measure(). - In
onMeasure(), child calculates width/height, thensetMeasuredDimension(). - Parent calls
child.layout()with final child size/position.
Now we understand roughly how the measuring works, let’s try to put our TimerView inside a parent and see how it behaves when we set different constraints.
Case 1
<FrameLayout
    android:id="@+id/parent1"
    android:layout_width="300dp"
    android:layout_height="300dp"
    android:layout_gravity="center_horizontal"
    android:background="@android:color/darker_gray">

    <me.lvguowei.timerview.TimerView
        android:id="@+id/timer1"
        android:layout_width="200dp"
        android:layout_height="200dp"
        android:layout_gravity="center" />
</FrameLayout>
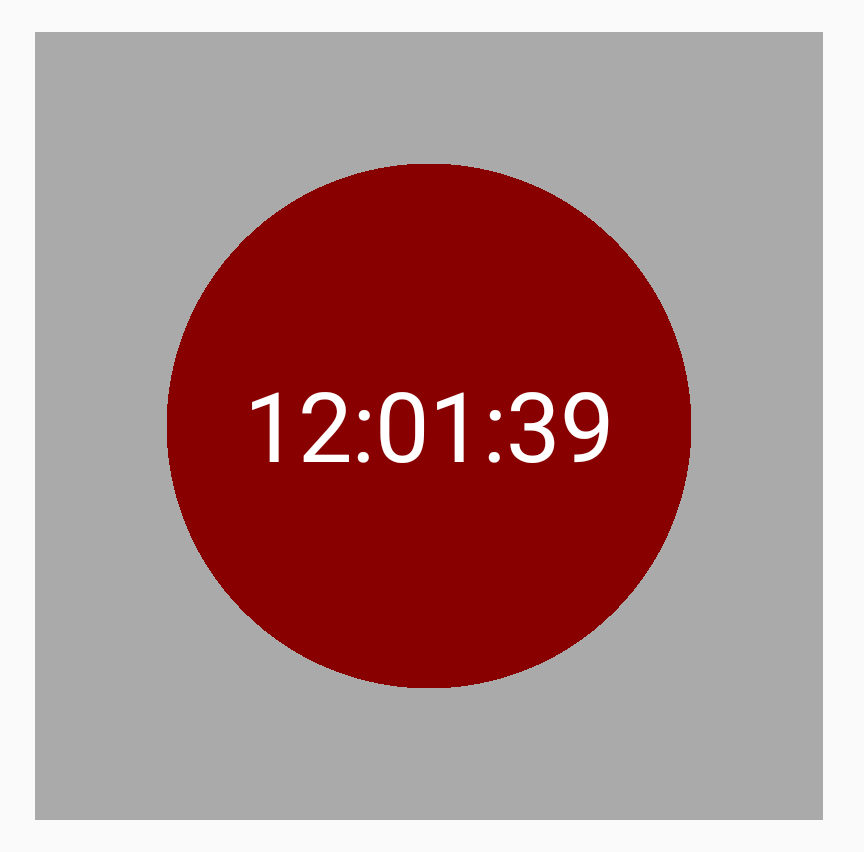
In this case the parent has the size of 300dp x 300dp and TimerView has the size of 200dp x 200dp, the result is expected, the TimerView fits in the parent pretty well.

Case 2
<FrameLayout
    android:id="@+id/parent2"
    android:layout_width="300dp"
    android:layout_height="300dp"
    android:layout_gravity="center_horizontal"
    android:background="@android:color/darker_gray">

    <me.lvguowei.timerview.TimerView
        android:id="@+id/timer2"
        android:layout_width="match_parent"
        android:layout_height="match_parent"
        android:layout_gravity="center" />
</FrameLayout>
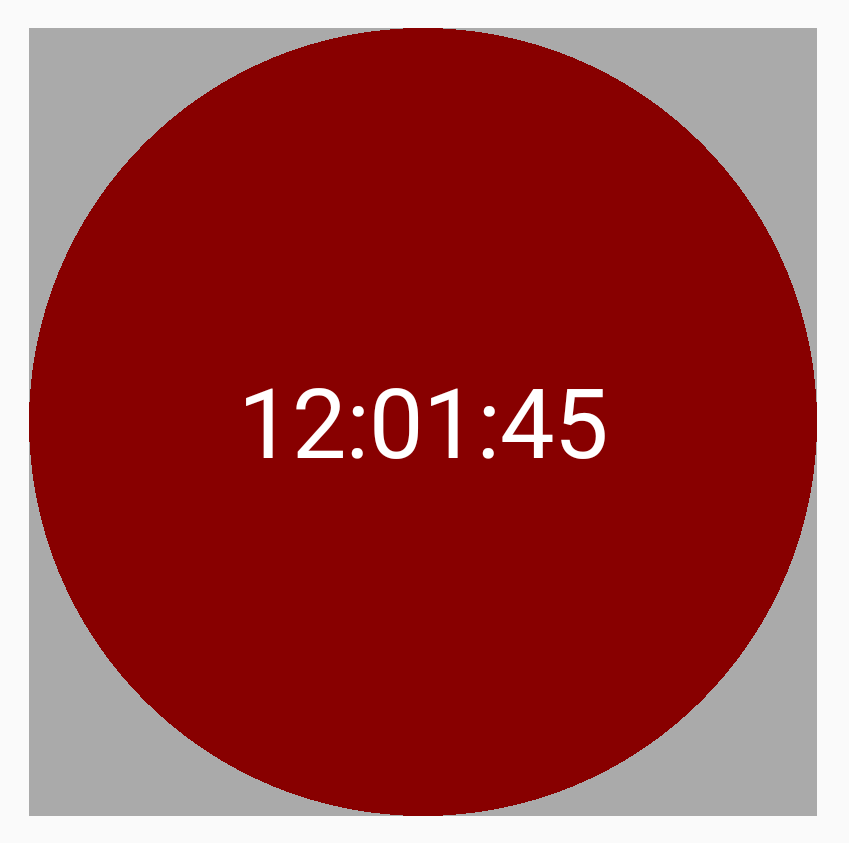
In this case the parent still has the fixed size of 300dp x 300dp, but the TimerView now has size of match_parent on both width and height.
The result is also pretty good, now the TimerView has the same size of its parent which is 300dp x 300dp.

Case 3
<FrameLayout
    android:id="@+id/parent3"
    android:layout_width="300dp"
    android:layout_height="300dp"
    android:layout_gravity="center_horizontal"
    android:background="@android:color/darker_gray">

    <me.lvguowei.timerview.TimerView
        android:id="@+id/timer3"
        android:layout_width="wrap_content"
        android:layout_height="wrap_content"
        android:layout_gravity="center" />
</FrameLayout>
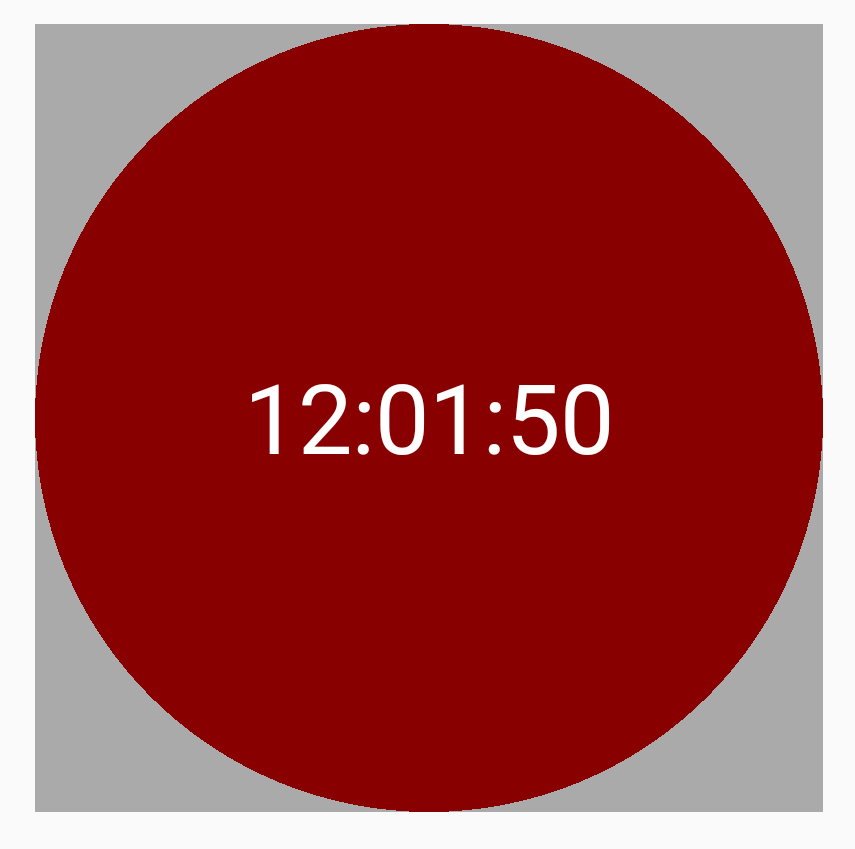
In this case, the parent is still 300dp x 300dp, but the TimerView is now both wrap_content. What we are expecting is that the TimerView will be just big enough to contain the time text in it. But instead, we get the same result as in case 2, which the TimerView just fills in the whole parent.

Case 4
<FrameLayout
    android:id="@+id/parent4"
    android:layout_width="300dp"
    android:layout_height="wrap_content"
    android:layout_gravity="center_horizontal"
    android:background="@android:color/darker_gray">

    <me.lvguowei.timerview.TimerView
        android:id="@+id/timer4"
        android:layout_width="wrap_content"
        android:layout_height="match_parent"
        android:layout_gravity="center" />
</FrameLayout>
In this case something interesting happened. The height of the parent is set to be wrap_content, and the TimerView’s height is set to be match_parent. Which sounds like it’s a dependency cycle. And the result is not good, we don’t even see the TimerView, which means it gets an 0 height in the end.
Now we have seen the problems we will run into if we don’t implement onMeasure() carefully. In next installment, we will address that.
Source code here.

Share this post
Twitter
Google+
Facebook
Reddit
LinkedIn
StumbleUpon
Email